Best way to clean bird feeders
To clean bird feeders regularly then there's no additional steps to follow, yet a feeder allowed to buildup with stains or mold will need other ways to kill off this nasty stuff.
Best way to clean all bird feeders is to begin by taking it apart, soak them in a hot bowl of soapy water, along with a homemade distilled vinegar cleaning solution. Soak for 5 to 10 minutes to soften up residue but always clean dirtiest feeders last. Scrub each part rigorously then rinse off soap residue on all parts.
What can be the best way to clean bird feeders regardless of how they are made or what common backyard birds they're intended for, you must fully disassemble each part.
Each bird feeder part will then be soaked in a bubble bath for up to 10 minutes, before you get in their and scrub each part with a brush, rag or scour - to get in every crack and cranny you know best how to.
When a simple dish soap isn't enough, it can be combined with a safe bacteria killing, mold and residue removing - distilled homemade vinegar cleaning solution - which is added to the point of the parts soaking.
Cleaning bird feeders isn't always easy as internal areas are hard to get to, thus a special cleaning brush can by available such as a Hummingbird feeder cleaning kit; kits like this can contain fine brushes or equipment to get at hard to reach areas.
Why manufacturer's prioritize a cleaning kit for Hummingbird feeders is because hummers risk dying from dirty feeders if port feeding wells are dirty; thus a Hummingbird feeder takes precedence over all other kinds of bird feeders available.
Its imperative you clean bird feeders as often as you can to starve off mold, bacteria or residue - which can be hard dried up bird food, grease or oil - which clings onto the inner clear tube or cylinder of a wire bird feeder.
Come the final step of cleaning all bird feeder parts, just before they can air dry - do make sure you wash off soap residue as dried soap can stain bird feeders, yet can cause harm to birds if swallowed.
Fully disassemble parts
Now we can't properly clean any kind of bird feeder whilst they are still fully assembled, thus the only way to clean a bird feeder is to take it apart, if at all possible.
Its certainly not possible to dismantle all bird feeders, such as suet cage bird feeder, but we can certainly try. Reason being its impossible to clean any feeder made to hold bacteria germinating bird food, if we can't clean the interior where its stored.
To be ahead of the game you may have easy to clean bird feeders at your disposal, but despite those options - I can assure most bird feeders are easy to clean regardless.
Fully disassemble all parts on any bird feeder that allows you to then, by prioritizing access to the inner cylinder or plastic clear tube if applicable.
No instructions are needed especially if you threw them away a long time ago, but for each type of bird feeder disassembly will go similar to this:
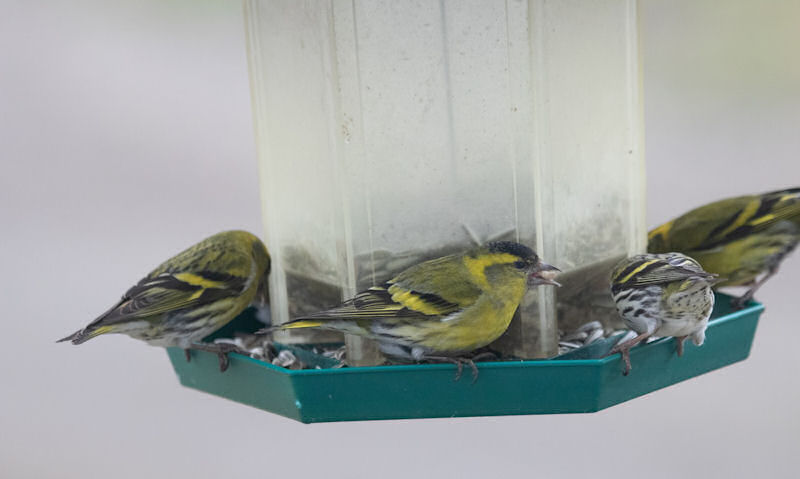
- Seed Mix tube feeders - Easiest type of bird feeder to disassemble which can be be taken apart at both ends to give you full access to the clear plastic tube
- Fine wire mesh Nyjer seed feeder - Base can be unscrewed or clipped away, whilst the lid on top can be pulled up and out of the way to access the interior
- Sunflower seed feeder - Unscrew or twist off the base whilst the lid can be limited to being pull up and leaned over out of your way when you clean inside
- Peanut feeder - Most common wire mesh peanut bird feeders will require you to undo the screws to remove the base, whilst the lid is only pulled out of the way
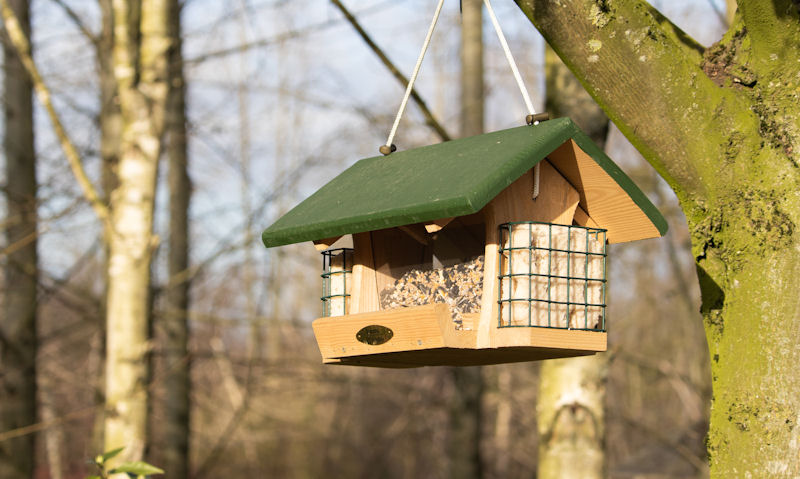
- Wooden bird feeder - Made mostly to accommodate seed mixes, usually the roof lifts up but doesn't come off all the way, but clear plastic panels are pulled out
- Suet Cage feeder - Be it a standard suet cake or fat ball feeder, none of which can be disassembled, so are ready to be cleaned out with dismantling
- Hung or mounted dish - Obviously a simple bird feeder wire mesh tray or clear plastic dish requires NO taking apart
- Open top platform feeder - No disassembling any kind of open top platform bird feeder but the treated wood would require a gentle cleaning solution
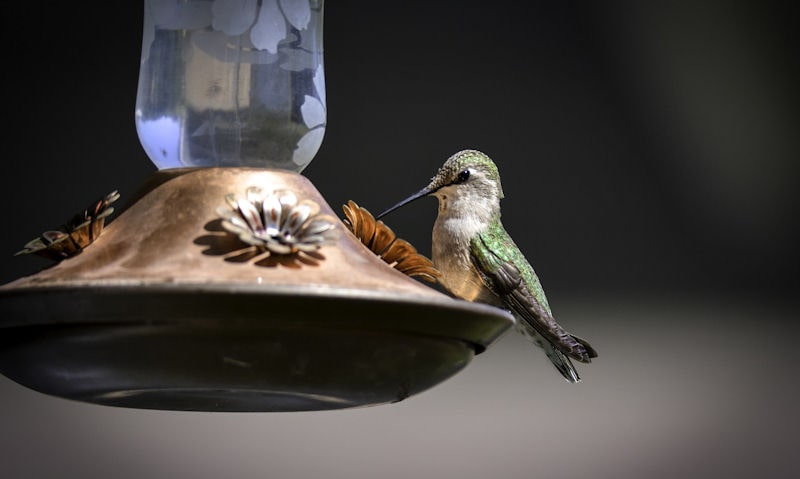
- Nectar-filled Hummingbird or Oriole feeder - Unscrew base plus bottom into multiple parts - whilst pushing out the port wells to fully access the nectar reservoir
Bathe in soapy hot water
Where your able to fully disassemble your bird feeder, do so before submerging all plastic, metal or wooden feeder sections into a bowl of boiling hot, soapy water.
As with anything you clean at home such as the dishes, would be to allow some time for the stubborn residue or filth stuck in unbeknownst areas to soften up in hot water, so its easier to come off on its own - or if you must lift it up by scrubbing.
Bird food that appears to stay clean can still turn a once brand new bird feeder into an eyesore inside and out, thus all bird feeders will get a bit on the messy side along with others getting far worse.
Do try and put all bird feeder parts into the bowl placed outdoors only whilst avoiding using the kitchen sink as a matter of health and safety.
Give all parts a 5 to 10 minute soak then, before removing all bird feeder sections to move onto the next phrase of cleaning bird feeders the best way you know how.
And the best way to clean bird feeders must always begin with a thorough soak in hot soapy water only - by utilizing safe everyday dish soap which is safe on most bird feeders - if indeed the potential dangerous soap residue is later removed.
Dirtiest bird feeders go last
Did I mention, before you think about cleaning what is probably going to be multiple bird feeders in one go, do the right thing by cleaning the dirtiest bird feeder last.
Order of cleaning bird feeders goes cleanest to filthiest, thus the grime or muck leftover on nasty bird feeders will only go onto making the next bird feeder harder to clean... and the next one after that and so on.
Dirtiest bird feeders must go last because they are guaranteed to leave a bowl of dirty, residue ridden water you won't want to clean anything else in.
With that, your cleaning equipment will also get a bit on the dirty side so will need cleaning individually.
When I refer to cleaning the dirtiest bird feeders last, that also goes for cleaning all suet bird feeders last - as this type of feeder can leave behind a big old grease slick.
Rather than cleaning one bird feeder at a time, I would advice you to disassemble all feeders at first; then if you like you can only put the messiest bird feeder parts in the bowl to soak - as it will save you time and effort than repeating the process for each feeder.
With that said, its possible the bowl full of hot soapy water will have to be changed once or twice before you complete the bird feeder cleaning steps.
Scrub deep in every crevice
Now that you have taken your bird feeders apart to allow 5 to 10 minutes to soak in grease cutting everyday dish soap, unfortunately its time to put in a bit of elbow grease.
Bird feeders like clear plastic tubes would require a soft brush or rag, whilst any wire mesh bird feeder could require a scour to lift up stuck in place seed or nutty chunks.
Allow me to quickly suggest the best way to clean by hand every bird feeder you may own - assuming the feeder is taken apart with all sections in a bowl of soapy water:
- Seed Mix tube feeders - Clean inner clear plastic tube best you can with scour, whilst using a long soft brush to reach the middle - other small plastic parts can be cleaned with a scour to lift off stubborn seed residue
- Nyjer seed feeder - Clean fine wire cylinder with hard brush whilst the base, lid and hanger can be cleaned individually by using a scour
- Sunflower seed feeder - Lift up oily seed residue left behind on the base whilst the metal wire cycling can be cleaned with a scour
- Peanut feeder - Use a long hard bristle brush to clean the inner wire mesh cylinder, all while the smooth plastic parts can be scrubbed with a scour
- Wooden bird feeder - Made in wood bird seed feeders can be partially submerged in soapy water, yet the detachable parts can be cleaned separately
- Suet Cage feeder - Hopefully you left the messy suet cake or fat ball feeder until last, of which you'd scrub them with a scour to avoid splashing with a brush
- Hung or mounted dish - Simple dish or tray doesn't need disassembling to clean but the bolts or sections to mount on a pole could do with a scrub with a scour
- Open top platform feeder - Unlikely to be disassembled or soaked in a bath, thus hot soapy water can be throw over whilst scrubbing with a brush - in the meantime do avoid damaging the wood or causing the paint or stain to fade
- Nectar-filled hummingbird or Oriole feeder - Owning a Hummingbird or Oriole feeder, you'd want to utilize what is a specialty cleaning kit which uses different size brushes to get into tight corners whilst cleaning in bacteria prone port wells
Rinse off soap reside
How to clean every bird feeders is pretty much using an identical technique that requires a bowl of dish soapy water - followed by cleaning it by hand with a brush, rag or scour.
All of which, you must pick your cleaning equipment carefully in order to avoid scratching delicate plastic surfaces.
What you may have not realized just yet, is dish soap residue left behind after a thorough clean can both damage the feeder - whilst potential harming birds if they end up ingesting the dried up soap.
How we can about to ensure the soap residue is gone for good, would be to rinse every bird feeder part with clean water, before repeating the same process to be sure.
Soap residue can stay once you allow each bird feeder parts to air dry before re-assembling again - because bubbles can build up in little crevices if not properly washed away.
So there you have it, with every part cleaned in everyday dish soap, even the dish soap must be removed completely as it can damage a feeder or make birds unwell.
Disinfect in effective solution
Let's rewind several steps, back to where you soak bird feeder parts in a bowl of boiling hot soapy water out in your yard.
You can continue to clean bird feeders with dish soap if feeders don't get too much in a state - but you may need to do more to remove stains or residue.
What I didn't previously mention which is an option to proceed with at the end, is disinfecting each and every bird feeder part in an homemade cleaning solution - made up in a super safe distilled white vinegar or a risky bleach solution.
What happens is you make the safe white vinegar cleaning agent with a part 1 vinegar to a part 4 hot soapy water.
Similarly, a much stronger yet diluted bleach solution will use one part bleach to 9 parts hot soapy water. How to measure a vinegar or bleach solution is simply using a mug or jug as one part... thus its one jug of vinegar to four jugs of hot soapy water, for example.
Making up a cleaning agent last can be bit of a bother, thus to make up the vinegar solution at the soaking in a boiling hot bowl of soapy water stage, would be the best way to clean bird feeders plus disinfect all parts at the same time.
To summarize
Best way to clean any bird feeder possible is to first take apart every section you can, to soak all small parts plus larger sections in a bowl of soapy boiling hot water.
At this stage you'd want to learn how to make a quick, safe and simple distilled white vinegar cleaning solution to add to the bowl. Vinegar contains acidity which can cut through residue whilst lifting up stains.
Second option is to use an homemade bleach cleaning solution that can be used for feeders that aren't clean very often - so are sure to have a huge buildup of grime.
In the end, if you clean bird feeders on a regular basis it won't hurt just to clean them in a simple dish soap.
Now and again a strong cleaning agent can be used to be sure unseen grime is lifted up and off - whilst any lingering bacteria or mold can be washed away.
Remember, always clean the dirtiest of bird feeders last because to do them earlier on will require a change of water with a new bowl of disinfectant made up. With that, the cleanest bird feeders will take on the grime, grease and residue of the nastiest feeders.
After a long 5 to 10 minute soak in a dish soap plus disinfectant solution, you can begin the process of cleaning all bird feeder parts with a combination of scrubbing with a brush, rag and especially a scour.
Follow all this up by rinsing all bird feeder parts with clean water to remove soap residue.


