6 CRUCIAL Hummingbird feeder cleaning tips
Cleaning hummingbird feeders is a must to continue to feed the birds in a safe way, as my refined list of six cleaning tips will explain.
Crucial hummingbird feeder cleaning tips begins be disassembling the feeder so the parts can be soaked in hot soapy water. Only then can you use a vinegar cleaning agent to kill the bacteria. Don't forget intricate areas with a thorough cleaning on the port wells, while doing all this twice or three times weekly.
Rather than boring you with a comprehensive how to clean hummingbird feeders guide, my refined cleaning tips is basically all you need with no time to waste.
Focus of my hummingbird feeder cleaning tips is listed with most critical first to less vital cleaning tips last, but all must be considered.
Hummingbird feeders do get a little messy over the course of their lifetime, thus to clean it twice weekly can avoid the most stubborn residue becoming fused to the feeder.
You only need to soak the hummingbird feeder for up to 10 minutes, or 20 minutes if you can spare it, in hot soapy water. Its only then the grime and sweet sticky mess caused by the sugar water can be washed off.
Sugar on the outer body of the hummingbird feeder can only encourage bees; then to get rid of bees is made far more difficult, with more time and hassle on your part needed.
How to properly clean a hummingbird feeder is with soap, but to use a safe vinegar cleaning solution can sure help kill off any bacteria.
Glass hummingbird feeder can be clean in the same way how to clean cheaper plastic feeders - with all of the top hummingbird feeders you can buy having their limits.
What that refers to is if cleaning a hummingbird feeder, it must be disassembled as best it can as to soak all parts before washing them over.
Don't be complicit when it comes to hummingbird feeder maintenance; to avoid cleaning now can only cause issues like leaking to develop later, which is caused by the build up of residue in the joints which is now causing nectar to drip.
1. Fully disassemble feeders
One true cleaning method that works better than anything else, is to be sure the hummingbird feeder is completely dissembled.
Now its not a possibility for most hummingbird feeders, but for most on the market it is possible to disassemble it fully or partially.
What that entails is unscrewing the glass or clear plastic container that holds the nectar mix - plus the top refill lid or the base that features multiple port wells.
Not much else can usually be pulled out or removed, other than perhaps bee guards and tips if they are feature; along with flower style feeding port wells that can all be popped out of their place. In addition, when making use of a hanging-style ant moat, don't forget this device also requires cleaning.
While the perches would ideally need taking apart, each perch design often doesn't allow this, so they must remain in place on the feeder base.
With anticipation of disassembling a hummingbird feeder - or any type of feeder for that matter - you'd then want to retain the instructions included, to know how to pull it apart and put the feeder back together again.
And there you have it, the best hummingbird feeder cleaning tip I can offer you, is to be sure to completely or partially disassemble the feeder that is made available.
2. Safe soap dish bubble bath
You know how it is, much like doing to dishes or even cleaning stubborn residue off an item around the house, same applies to a hummingbird feeder.
With a hummingbird feeder it is a little more important as you need to kill off germs, in which is only made possible with a long soak in a hot bubble bath.
Bath in question would be using a simple dish soap as the cleaning agent, with the feeders own designated plastic bowl reserved for cleaning wild bird products, as to not risk cross contamination.
Be sure to soak the hummingbird feeder in as many disassembled parts as possible, as oppose to soaking it whole as it won't be near as effective.
To soak a hummingbird feeder in a simple dish soap bath is not only the safest option, as household chemicals can have lasting effects on wildlife; soap dish is very effective of tackling residue build up of any kind.
To soak the hummingbird feeder in parts would need a 10-20 minute soak - to loosen the residue - but only then can this build up of grime be removed once its softened under the heat of a hot bubble bath.
Not so much a new cleaning tip that's for sure, but an obvious one that can be overlooked, thus making it harder to remove all grit and grime.
3. Disinfect with part vinegar solution
Only once you've removed the build up of grime and the most stubborn residue, you can begin the process of disinfecting the hummingbird feeder.
Not something that is always needed, but if you feel there's a build up of mold or a bacteria present on the feeder, its time to use a safe disinfectant solution that would kill most of the germs.
It is possible to use dark vinegar but I would suggest you forget that as the smell is more intense, thus harder to remove off the feeder as it bleeds into the plastic body, with staining a possibility.
You must then only use a white vinegar to use as a safe disinfectant on backyard bird products.
Don't use it straight up as you won't have enough of it, so what is involved is using a 50% white vinegar with 50% water.
This would create a powerful solution that is able to kill any bacteria or germs present, but understand not all of it can be killed off. With that in mind I can say it kills 99.9% of germs, as household brands promote their own range as such.
Hummingbird feeders must only use a vinegar cleaning solution, as a more powerful, harmful to anyone's health bleach or other chemicals can remain in the feeder - and so would be ingested as its mixed in with their sugar water mixture.
4. Clean feeders twice weekly
Not so much a direct cleaning method for hummingbird feeders, but a crucial tip that can make life a little easier, not just on the birds but on your too.
To not wash hummingbird feeders on a regular basis can indeed see bacteria or germs build up on the outside, so that is why you must clean hummingbird feeders to prevent this ever happening.
Not cleaning a hummingbird feeder as regularly as possible would see bacteria germinate in no time, thus leading to the hummingbirds getting sick.
Its suggested to clean your hummingbird feeder twice a week, as to not allow bacteria to develop in a short space of time. But that is only if you continue to replenish the feeder with new, fresh sugar water mixture more often than cleaning the actual feeder.
I can only say that to clean a hummingbird feeder three times a week is far better than the two, as this applies more in hot, humid conditions in sunny States like Texas.
Be sure to clean the hummingbird feeder as often as you possibly can, while focusing on killing off slowly developing bacteria, and so to residue that would be harder to remove the longer you leave it.
5. Wash off soap or smell
What can often go unnoticed when cleaning any type of hummingbird feeder, is not actually cleaning the feeder of soap residue.
What happens when you give a hummingbird feeder a soak in a bubble bath, and then a soapy wash with a scourer, brush or cloth - is this soap gets deep into any crevices and holes you won't often know about.
Its only once you wash off the soap on the feeder, the bubbles are left to fester within these hard to reach, out of sight places.
In turn that can lead to the soap actually staining the plastic body or clear window of the hummingbird feeder bottle.
Its crucial then you understand the consequence of not washing the hummingbird feeder of its soap solution, as it can damage the feeder in due course.
Other than that, to not remove the soap on a feeder could see the soap mixing in with the sugar water solution - no hummingbird would be willing to feed on it then.
More importantly, for your sake its vital to wash the feeder again soon after using a vinegar solution - to remove that powerful stink that can be left behind.
6. Brush all intricate areas
Last but not least is once again referring you to disassembling the feeder fully or partially depending on how its made.
Only then would it be possible to comb through the feeders must intricate parts with a fine brush or soft head toothbrush.
Areas that don't get enough attention would obviously be the feeding holes or port wells as they're known. Its in this hole the comb or other delicate cleaning instrument must be inserted to wash off a build up of congealed sugar.
Its not easy I grant you nor is it often possible at all, but at least you can do is run hot soapy water through these wells as to clean them all out thoroughly.
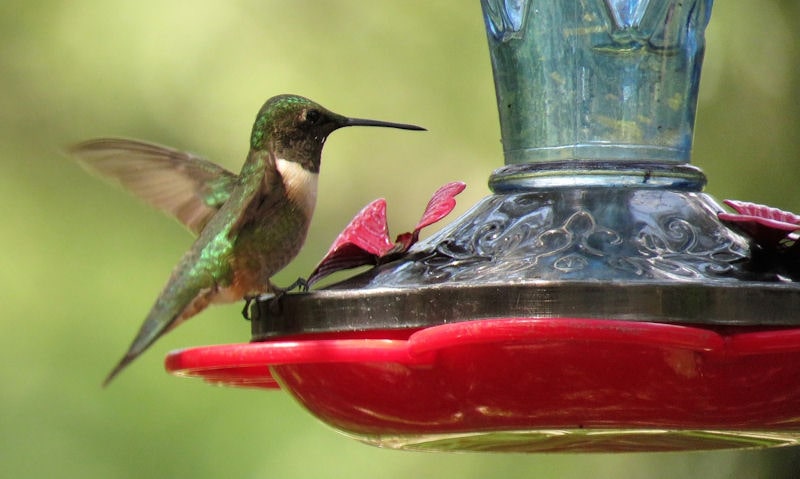
What is attached to these port wells is the detachable imitation nectar flowers that must be pulled out to be soaked in soap, and so to a vinegar disinfectant if need be.
Similarly, if you have bee guards attached to the entrance of the port wells, there're guaranteed to be detachable - clean them as you would the clip-on replica flowers.
Sitting beneath all this would be the perches hummingbirds land on to feed, its vital then to wash these thoroughly, knowing its unlikely they would be detachable.

